
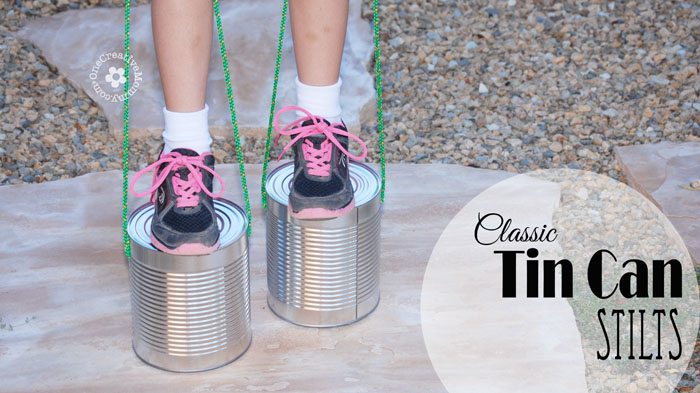
Check out our fun Tin Can Stilts Tutorial for a project that will keep boredom at bay all summer long!

Jump to:
Today I'm sharing a tutorial for a fun classic toy -- Tin Can Stilts! My daughters took them out for a spin around the neighborhood, and all their friends wanted to give them a try. The best part is that they are simple to make, and they use materials that you probably have around the house already. It doesn't get much better than that!
How to Make Tin Can Stilts
Ready to learn how to make them? The first thing you need to do is check your cupboards, because it's time to recycle!
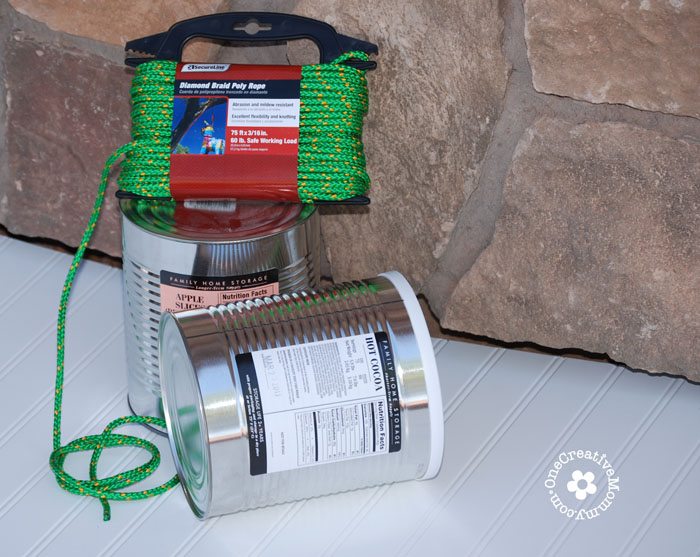
Materials:
- 2 clean and empty tin cans (I used cans from my food storage. Yes, my family drinks a lot of hot cocoa! Coffee cans and family-sized soup cans work well for this project, too. The larger the can, the bigger the kid that will be able to use the stilts.)
- Rope (I purchased 75 feet of rope at Walmart for around $6 because I needed it for some other projects. You can use old jump ropes if you have them. The length you need depends on the height of the tallest person who will use the stilts. I used two lengths of rope that were about 60 inches each. More on this later.)
- Two C clamps (My hubby has the coolest C Clamps. You can open and close them with one hand! I love them!)
- A piece of scrap wood
- A power drill with a metal drill bit slightly larger than the diameter of your rope
- A hammer and a sharp nail
- A metal file
Directions:
- Wash the inside of your cans and remove the labels. Be extra careful with the edge where the lid was removed!
- Turn your cans so that the closed end is facing up. You will be drilling holes about an inch and a half below the closed end of the can.
- Set up your can like you see below. Use one C clamp to pin the scrap wood to the table and one C clamp to pin the can to the scrap wood. The scrap wood does not go all the way into the end of the can. When you drill into the can, you should not also be drilling into the wood. (If you do, it's okay. It just makes it a little bit harder.) I know you are all jealous of the card table I am using as my work station!

- Before you begin drilling, use a nail and a hammer or mallet to make a small indentation where you plan to drill your hole. It will help keep the drill bit from slipping when you begin to drill. Your holes should be about 1 ½ inches from the closed end of the can and should be equidistant from each other. You need one hole on each side of the can.
- Drill two holes in each can.

- Use a metal file to smooth the rough edges around the drill holes. These cans will be handled by kids, so don't leave any sharp edges. File from the inside and the outside of the can. Check the edge where the lid of the can was removed. File any rough edges there as well. If you can't get it as smooth as you would like, try covering that inside edge with duck tape for extra protection.
- To decide the length of rope you will need, ask your tallest child to stand on a can with his arms at his sides. The rope should be long enough to go from the hole, to his hand (and across the palm), and then back into the other hole. Add extra length for two knots. Cut two lengths of rope (one for each can).
- If your rope is made of nylon, use a lighter to burn the ends of the rope so that they don't fray. (Ask any boy scout about that one. It's the Tenderfoot 4A requirement. If you have a scout, here's a good time for him to use his skills!)
- Thread one end of the rope into the can from the outside. Tie a knot inside the can. Thread the other end of the rope through the hole in the opposite side of the can and tie another knot. (I used granny knots, and they are holding up just fine.)
- Repeat with your second can.
That's it! A really quick and easy project. Feel free to decorate your cans. I opted to skip that step. Sometimes I go a bit overboard with my projects when the kids are just as happy with simple. The simpler the project, the more time the kids have to actually play with it!
I hope you have a great time creating these tin can stilts for your kids. (Go ahead. Try them yourself! Getting silly with your kids makes everything more fun!)
Clare says
These look like a lot of fun! And not that difficult to make either. I'm pinning this for later 🙂
Heidi Fowler says
Thanks so much, Clare. They really are easy and fun.
Meg K says
Love these & so would my daughter 🙂
Heidi Fowler says
Thanks, Meg! I hope you both have fun with them.
Heidi says
Thanks so much, Amy. The boys in our neighborhood loved them. They stood right in line with the girls to take a turn!