
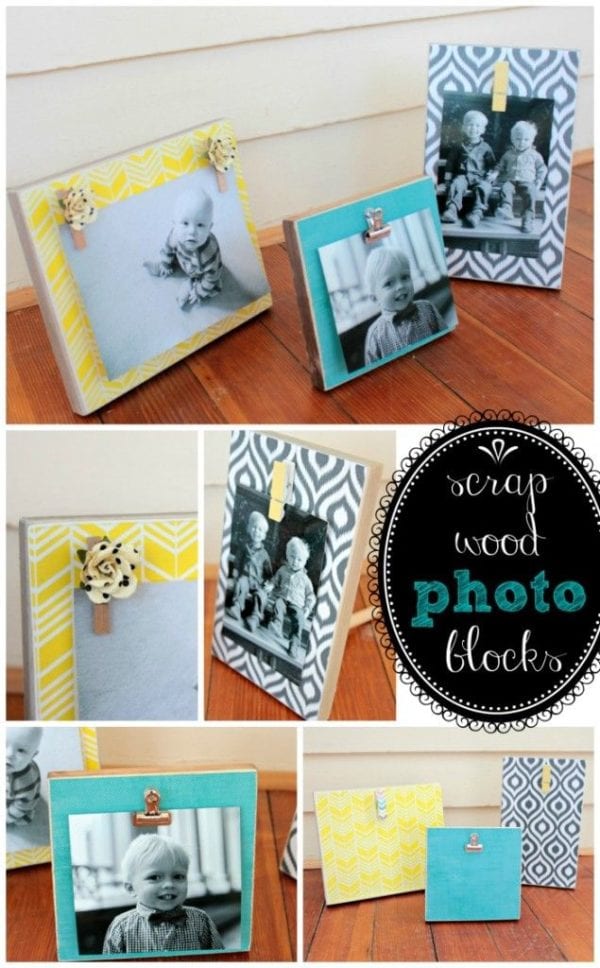
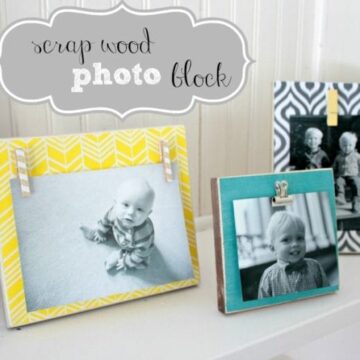
Super easy Scrap Wood Photo Blocks make an awesome DIY gift for birthdays, Mother's Day or any other holiday!

Happy Monday, everyone!! Let me first introduce myself quickly and say 'hello'. I'm Katie from View From The Fridge, and I am absolutely delighted to sharing with you my first post as a contributor to Juggling Act Mama! I just love anything crafty, a good DIY challenge, and decorating our home on a budget.
Today, I'm going to share a fun project we worked on this past weekend. It involves scrap wood (of which we seem to have a lot of around our house lately), fun scrapbook paper, and some mod podge! The finished product is a cute and unique way to display your pictures!
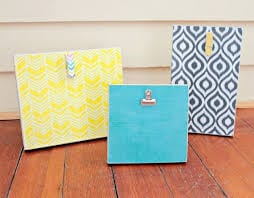
Besides being a very inexpensive project ... the best part about these, are the fact that you can customize the colors and patterns to fit your decor! These particular blocks happened to be bound for our baby #3's (due in May) nursery. We're not finding out the gender, so the room's color scheme at the moment is yellow, grey, and turquoise. These blocks will add some color AND some personality to the room!
So ... you want to make some for your home? Or maybe as a cute, homemade gift? Here's how ...
Materials
- Scrapbook paper in your favorite colors and patterns (could even use fun wrapping paper or fabric)
- Scrap piece(s) of wood. I used pieces of popular board leftover from installing new trim in our soon-to-be shared big-boy room.
- Mod Podge. I used the paper Matte kind of Mod Podge because it didn't want the finish too shiny.
- Finish for wood (this is optional ... you could leave it bare, too). I used stain on two blocks (a grey and a dark walnut) and watered down craft paint on the third (just to see what I liked the best).
- Dowel (I used ½" dowels). You can buy these at the craft store in 3' lengths for less than $1.
- Drill with bit the same size as your dowel.
- Clips. I tried out a variety of types of clips here, some purchased, some handmade (see steps below).
- A saw (to cut dowel) and sandpaper to sand edges of block (I used 80 grit).
Instrucitons
- Apply finish to scrap piece of wood. I tried a dark walnut stain (on the turquoise block), a grey stain (on the tall grey and white block), and watered down craft paint (to allow grain to show through) on the yellow block. You decide which is your favorite or leave the wood bare!
- After finish is applied to front, flip the block over and drill a hole (same size as your dowel) near the bottom. I centered my ½" hole 1 ¼" up from the bottom of the block (in the center of the bottom edge). Make sure you don't drill your hole all the way through to the front.
- Make sure dowel fits, then saw dowel to desired length. The shorter the dowel, the more 'tilt' your block will have. I cut mine in varying lengths, but the average was around 5" long. My advise ... start longer, and cut down from there if needed. Sand the cut edges.
- Insert the dowel rods into the back of the frame. You just created your ... dowel rod 'stands'. You can remove the dowel to finish the front of your block.
- Cut scrapbook paper to the exact size of your block. You will sand edges after the mod podge dries, so if the edges don't match exactly, you should be fine.
- Apply a GENEROUS amount of mod podge to front of block. It will dry clear ... so don't be stingy here!!
- Press scrapbook paper over top of block and smooth into place. Make sure all edges and corners and sticking down. If you need to place something flat on top of your paper and block to keep the edges down, do that now.
- Wait 10-15 minutes, then apply a layer of mod podge on top of paper and around edges. Make sure the edges get covered completely. Apply another 1 or 2 coats of Mod Podge over paper, allowing about 30 minutes for each coat to dry in between.
- Once mod podge is completely dry (I recommend leaving it over night), sand the front edges of your frame. You could use an electric sander here, or some elbow grease and a hand sander (as in my case). The goal here is to make the paper look like it's fused right into the wood (all one piece). You can see how the edges of my frames have been sanded down to reveal the bare wood through the finish. This is the look I was going for.
- Apply clips to top of block (see options below), stick dowel into back of block, add a cute picture (or fun quote???) and display!
NOW, OPTIONS FOR THE CLIPS ...
I tried a couple things here with the clips. Again, choose your favorite or do one of each!
- Option 1 - Make paper flower clips with mini clothes pins and paper flower embellishments (both purchased from Michael's). Glue flower onto clothes pin, hot glue pin onto center of frame (or two on either side if you want a larger photo).
- Option 2 - Use washi tape to decorate mini clothes pins and glue in place on frame.
- Option 3 - Michael's has some cute painted min clips. I bought these 'pastel' collection clips for $2.
- Option 4 (this might be my favorite) - purchase some 'bulldog clips' from an office supply store and screw into place on block.
Choose your favorite pictures, and display!

I hope this brought some inspiration to your Monday! Have a wonderful week, and I'll be back next month with more craftiness! Thanks for having me!
DIY Scrap Wood Photo Blocks
You'll love this fun project for upcycling scrap wood!
DIY Scrap Wood Photo Blocks
As an Amazon Associate, I earn from qualifying purchases.
Equipment
- Drill with bit the same size as your dowel.
- Clips. I tried out a variety of types of clips here, some purchased, some handmade (see steps below).
- A saw (to cut dowel) and sandpaper to sand edges of block (I used 80 grit).
Materials
- Scrapbook paper in your favorite colors and patterns (could even use fun wrapping paper or fabric)
- Scrap piece(s) of wood. I used pieces of poplar board leftover from installing new trim in our soon-to-be shared big-boy room.
- Dowel (I used ½" dowels). You can buy these at the craft store in 3' lengths for less than $1.
- Finish for wood (this is optional ... you could leave it bare, too). I used stain on two blocks (a grey and a dark walnut) and watered-down craft paint on the third (just to see what I liked the best).
- Mod Podge. I used the paper Matte kind of Mod Podge because it didn't want the finish too shiny.
Instructions
- Apply finish to scrap piece of wood. I tried a dark walnut stain (on the turquoise block), a grey stain (on the tall grey and white block), and watered down craft paint (to allow grain to show through) on the yellow block. You decide which is your favorite or leave the wood bare!
- After finish is applied to front, flip the block over and drill a hole (same size as your dowel) near the bottom. I centered my ½" hole 1 ¼" up from the bottom of the block (in the center of the bottom edge). Make sure you don't drill your hole all the way through to the front.
- Make sure dowel fits, then saw dowel to desired length. The shorter the dowel, the more 'tilt' your block will have. I cut mine in varying lengths, but the average was around 5" long. My advise ... start longer, and cut down from there if needed. Sand the cut edges.
- Insert the dowel rods into the back of the frame. You just created your ... dowel rod 'stands'. You can remove the dowel to finish the front of your block.
- Cut scrapbook paper to the exact size of your block. You will sand edges after the mod podge dries, so if the edges don't match exactly, you should be fine.
- Apply a GENEROUS amount of mod podge to front of block. It will dry clear ... so don't be stingy here!!
- Press scrapbook paper over top of block and smooth into place. Make sure all edges and corners and sticking down. If you need to place something flat on top of your paper and block to keep the edges down, do that now.
- Wait 10-15 minutes, then apply a layer of mod podge on top of paper and around edges. Make sure the edges get covered completely. Apply another 1 or 2 coats of Mod Podge over paper, allowing about 30 minutes for each coat to dry in between.
- Once mod podge is completely dry (I recommend leaving it over night), sand the front edges of your frame. You could use an electric sander here, or some elbow grease and a hand sander (as in my case). The goal here is to make the paper look like it's fused right into the wood (all one piece). You can see how the edges of my frames have been sanded down to reveal the bare wood through the finish. This is the look I was going for.
- Apply clips to top of block (see options below), stick dowel into back of block, add a cute picture (or fun quote???) and display!
Notes
- Option 1 - Make paper flower clips with mini clothespins and paper flower embellishments (both purchased from Michael's). Glue flower onto clothespin, hot glue pin onto the center of the frame (or two on either side if you want a larger photo).
- Option 2 - Use washi tape to decorate mini clothespins and glue in place on the frame.
- Option 3 - Michael's has some cute painted min clips. I bought these 'pastel' collection clips for $2.
- Option 4 (this might be my favorite) - purchase some 'bulldog clips' from an office supply store and screw them into place on the block.
More DIY Gift Ideas
- Mother's Day Printable
- Teacher Appreciation Gifts
- Rose Sugar Scrub
- Father's Day Frame
- Coconut Oil Sugar Scrub


Starla J says
Love these!! Great job!
domain says
Excellent blog post. I definitely love this website.
Keep writing!
eymi adrianza says
these are adorable!! i loved the little clips detail so much.
Benita says
These are adorable!!! Maybe I can give them a try. I have a fair amount of "crafting" failures...LOL
Kathy says
I love these and am planning to make these for a girls youth (ages 12-18) camp craft. How hard was it to get the screw in the bulldog clip? Trying to decide if I should play it safe with clothespins. Thanks!
Ang Paris says
Sorry for the delay in getting back to you on this, Kathy. The screw was super easy to twist in with a screwdriver. Definitely doable for 12-18 year olds. To make it even easier, you could pre-drill a tiny pilot hole in the blocks before even starting the project. Good luck! Such a fun project!! Thanks for the question!