
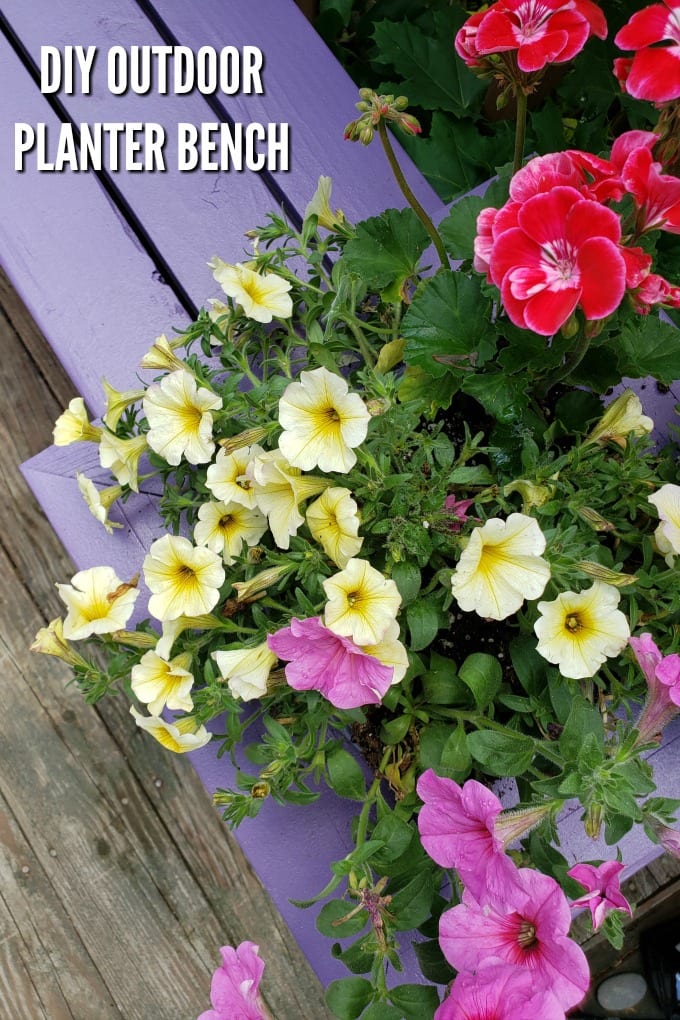
Creating a beautiful Planter Box Bench for your backyard is easier than you think! Just follow our step-by-step instructions for building an Outdoor Planter Bench.
Jump to:
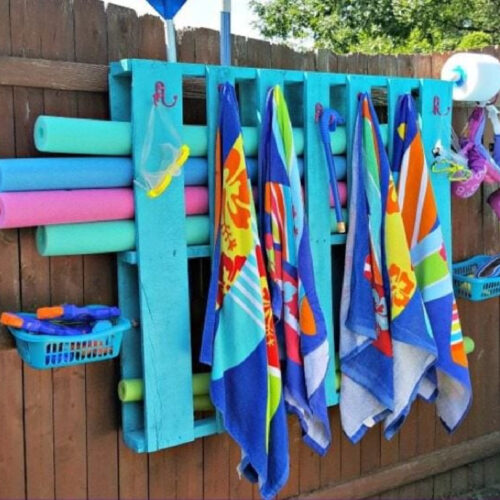
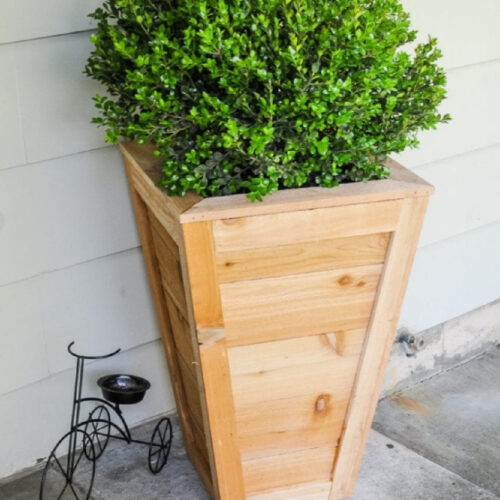
Our backyard has been an ongoing project since the day we moved in nearly 13 years ago. Each summer, we add something new to enhance our outdoor living space, like our DIY Outdoor Chalkboard and DIY Pallet Planter.
They say that when you're a home owner, there are always projects. It's so true! However, with the right tools you can really do a lot.
We needed more seating space in our backyard, so Mr. Juggling Act and I decided to create an outdoor planter bench. This gives us a couple extra spots, while adding a pop of color and a spot for some pretty flowers, too.

This might seem like a big project, but you can definitely put this altogether in a weekend.
Outdoor Planter Bench Materials
- (12) pressure treated 2"x4"x8' boards
- decking screws 2.5"
- exterior latex paint
- (2) 8" square planter boxes
Equipment Needed
- chop saw or circular saw
- cordless or corded drill/driver
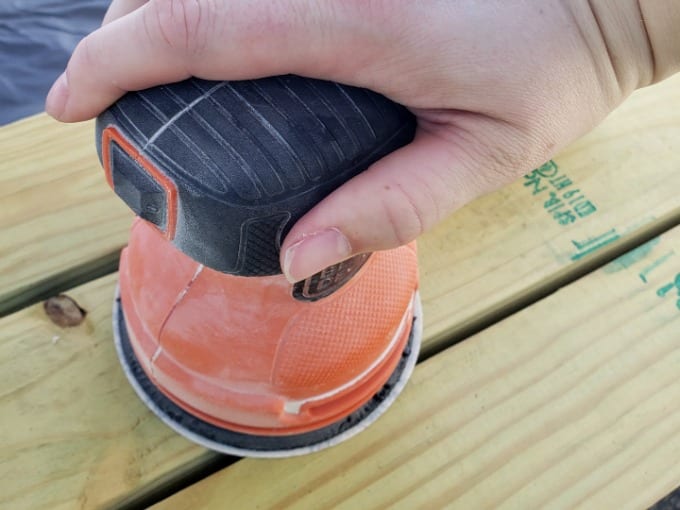
- Orbital Sander
- tape measure and speed square
- dust mask and safety glasses
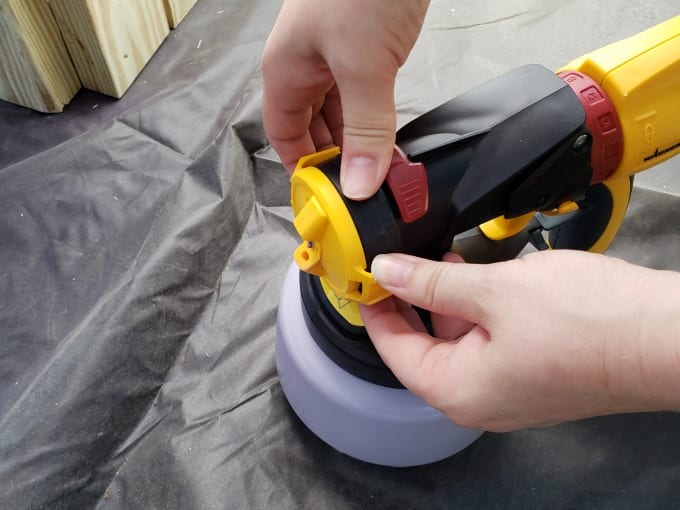
- Paint Sprayer & Studio Spray Tent (optional)
How to Build a Planter Box Bench
DISCLOSURE: It is important to note that I am not a professional. The ideas presented here are all my own, unless otherwise credited and I have shared tips based on my experience. I always recommend consulting and/or hiring a professional if needed. Be sure to check with local building codes to obtain all permits required for any DIY project.
Please always use all proper safety precautions and be sure to read and follow all manufacturer instructions. Finally, please note that I am not responsible for any outcome if you try this yourself; I am not liable for any injury or additional cost or expense incurred.
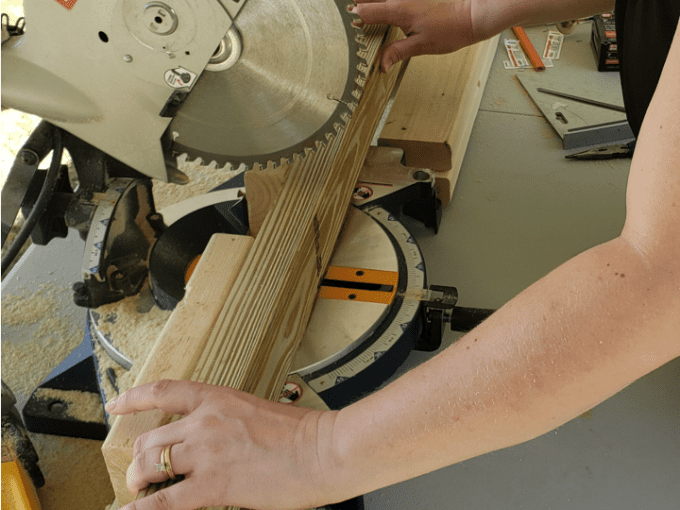
1: Cut the lumber to size
You will need the following cuts:
- (5) 4'
- (3) 8"
- (24) 1'6"
- (16) 9-½"
- (8) 1'3"
After that, cut the ends of the 1'3" pieces so they are angled at 45° on both ends.
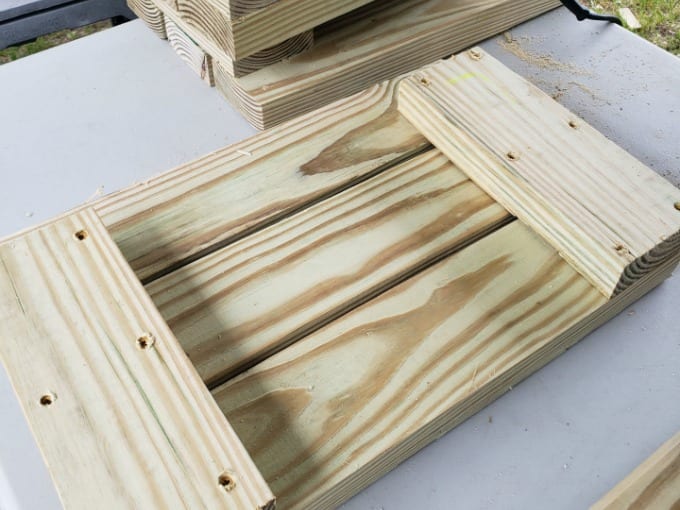
2: Assemble the seat
Use (3) 8" pieces and (2) 4' pieces to build the frame of the seat. Use one of the 8" pieces to add extra support to the middle of the bench frame.
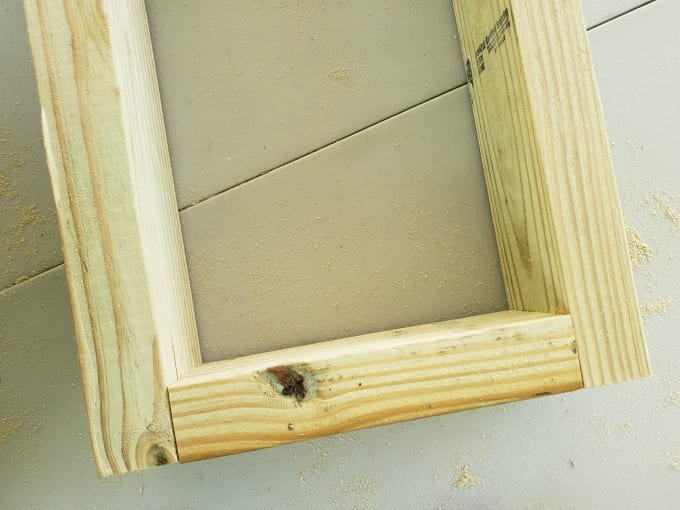
Add (3) 4' pieces across the top, with a ¼" gap in between the pieces.
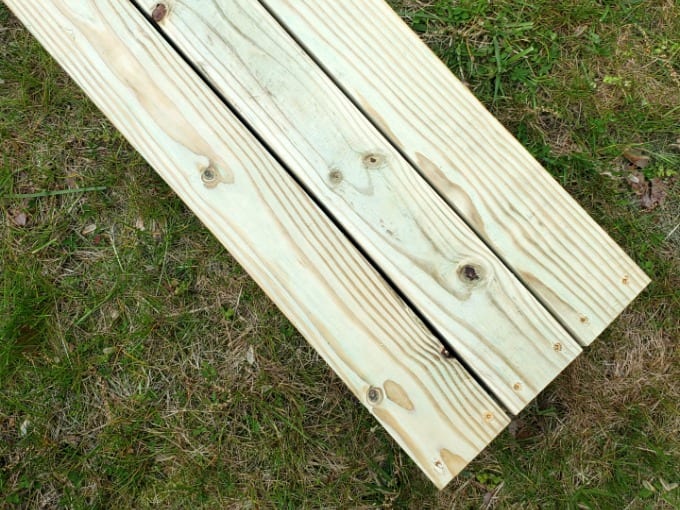
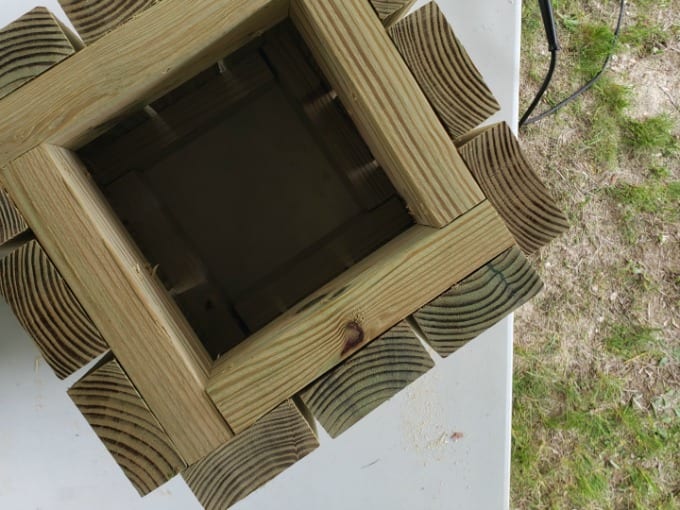
3: Put together the box sides
Each side of the box is exactly the same. Space (3) of the 1'6" pieces ¼" apart and secure on one side with the 9-½" piece at the top and bottom. You can use an extra carpenters pencil to help with the spacing.
Repeat until you have (8) identical sides.
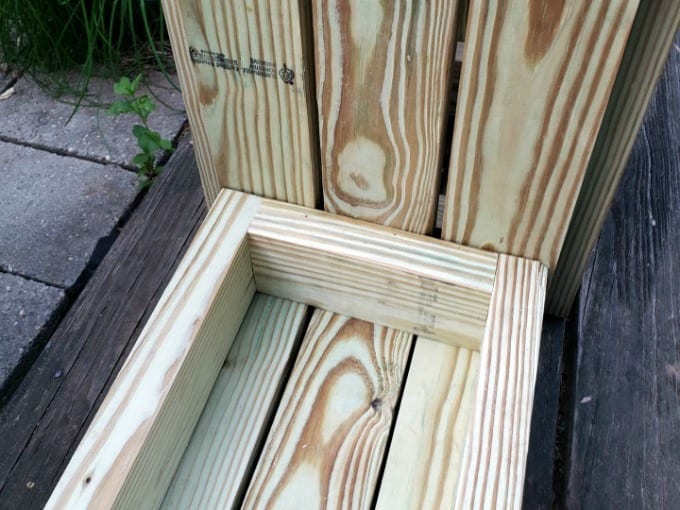
4: Assemble the boxes
Assemble the planter box sides together with the deck screws.
You may find it helpful to use clamps for this step.
5: Attach the boxes to the bench seat
After that, attach the boxes to either end of the bench seat.
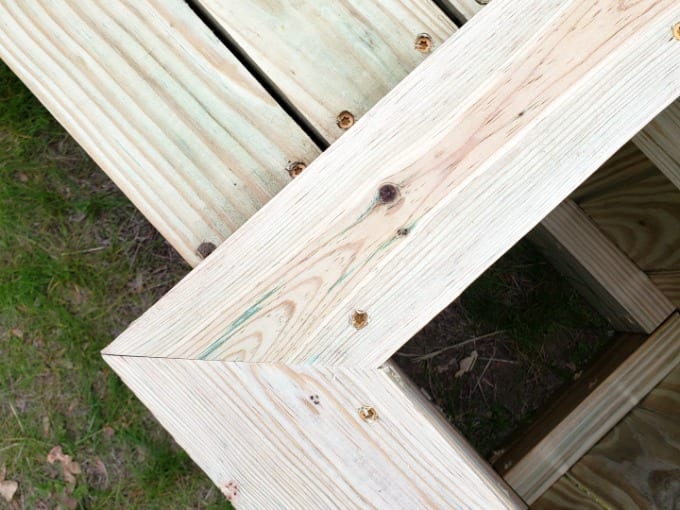
6: Add the top trim pieces to the boxes
Next, add the 1'3" pieces with the 45° cuts at the end to the top of the boxes.
7: Sand the completed bench
Sand down the bench and boxes. 120 grit sand paper works well. You can draw a wavy pencil line on the boards to make sure you are sanding evenly across the surface of the project.
8. Paint the Bench
The Studio Spray Tent is fabulous because it protects your work area. It doesn't matter if you are working in a garage or your driveway, overspray is inevitable.
With this tent protecting your floor and the surrounding area, you can use the Flexio 4000 and get your planter box bench finished in no time.
Tips for Painting the Bench
For the best results, I highly suggest thoroughly reading through the instructions on how to assemble and use the sprayer. Likewise, be sure to do a test spray and practice with the included spray poster.
We found that the Flexio 4000 sprayer was very simple to use and it's lightweight. You can adjust the settings to fit your project. So unlike our bunk bed project, we wanted a slightly more focused spray.
Here are are my tips for using your Flexio 4000 Paint Sprayer to paint a planter box bench:
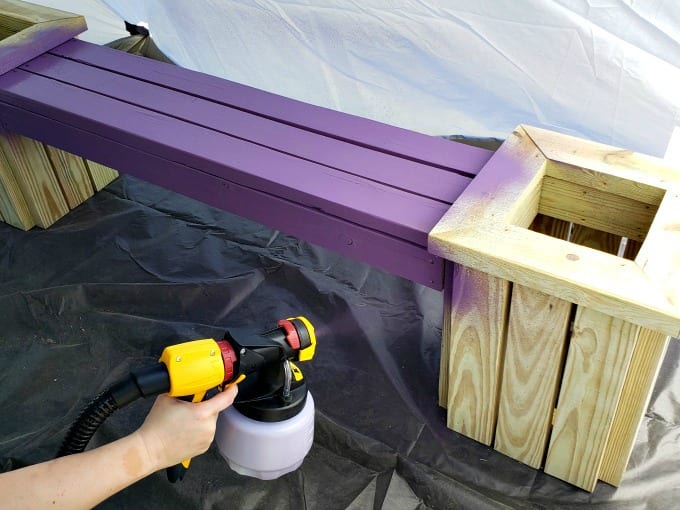
- Choose a good quality paint. I used “Napa Winery” from Behr Premium Plus Exterior in a satin finish.
- Set the pressure control on the X-Boost power dial to medium-high. This controls how much air power is created by the base.
- Set the material flow, which controls the amount that will be sprayed. Because exterior latex paint tends to be quite thick, you want it to be about 9-11.
- Change the air cap to match the direction you’re going to paint, either horizontal or vertical.
- Add paint to the cup and tighten the nozzle assembly.
- Set up the Wagner Studio Spray Tent and move the bench into it. This will protect your project as you work on painting it. It also protects the surrounding area from any overspray.
- Hold the sprayer about 6-8 inches from the surface and move the sprayer in smooth even passes across your surface.
- Allow the paint to dry before adding another coat or touching up any spots.
9. Plant the Flowers
When the paint is totally dry, move the bench to the spot where you want it to be. Insert the planters and add your soil and flowers.
Be sure to choose flowers that are appropriate for the spot you have chosen for your bench. For example, if your bench is in full sun you might like petunias like we used.
Printable Step-by-Step Tutorial

DIY Planter Bench
As an Amazon Associate, I earn from qualifying purchases.
Equipment
- chop saw or circular saw
- cordless or corded drill/driver
- orbital sander
- measuring tape and speed square
- dust mask and safety glasses
- Flexio 4000 Paint Sprayer
- Studio Spray Tent
Materials
- 12 pressure treated 2″x4″x8′ boards
- decking screws 2.5″
- exterior latex paint
- 2 8″ square planter boxes
Instructions
1. Cut the Lumber to Size
You will need the following:
- (5) 4′
- (3) 8″
- (24) 1’6″
- (16) 9-½″
- (8) 1’3″
- After that, cut the ends of the 1’3″ pieces so they are angled at 45° on both ends.
2. Assemble the Seat
- Use (3) 8″ pieces and (2) 4′ pieces to build the frame of the seat. Use one of the 8″ pieces to add extra support to the middle of the bench frame.
- Add (3) 4′ pieces across the top, with a ¼″ gap in between the pieces.
3. Put Together the Box Sides
- Each side of the box is exactly the same. Space (3) of the 1’6″ pieces ¼″ apart and secure on one side with the 9-½″ piece at the top and bottom. You can use an extra carpenters pencil to help with the spacing.
- Repeat until you have (8) identical sides.
4. Assemble the Boxes
- Assemble the planter box sides together with the deck screws.
- You may find it helpful to use clamps for this step.
5. Attach the Boxes to the Bench Seat
- Use the deck screws to attach the boxes to either end of the bench seat.
6. Add the Top Trim Pieces to the Boxes
- Next, add the 1’3″ pieces with the 45° cuts at the end to the top of the boxes.
7. Sand the Completed Bench
- Sand down the bench and boxes. 120 grit sand paper works well. You can draw a wavy pencil line on the boards to make sure you are sanding evenly across the surface of the project.
- After that, you are ready to paint.
8. Assemble the Spray Tent
- Use the instructions to assemble the spray tent to protect your work area from over spray.
9. Paint the Bench
- 1. Set the pressure control on the X-Boost power dial to medium-high. This controls how much air power is created by the base.
- 2. Set the material flow, which controls the amount that will be sprayed. Because exterior latex paint tends to be quite thick, you want it to be about 9-11.
- 3. Change the air cap to match the direction you’re going to paint, either horizontal or vertical.
- 4. Add paint to the cup and tighten the nozzle assembly.
- 5. Set up the Wagner Studio Spray Tent and move the bench into it. This will protect your project as you work on painting it. It also protects the surrounding area from any overspray.
- 6. Hold the sprayer about 6-8 inches from the surface and move the sprayer in smooth even passes across your surface.
- Allow the paint to dry before adding another coat or touching up any spots.
10. Plant the Flowers
- Once the bench is completely dry, add the planters. Be sure to choose flowers that will do well in the spot where your bench will be.
Notes
Painting Tips
For the best results, I highly suggest thoroughly reading through the instructions on how to assemble and use the sprayer. Likewise, be sure to do a test spray and practice with the included spray poster. Be sure to choose a good quality paint. I used “Napa Winery” from Behr Premium Plus Exterior in a satin finish.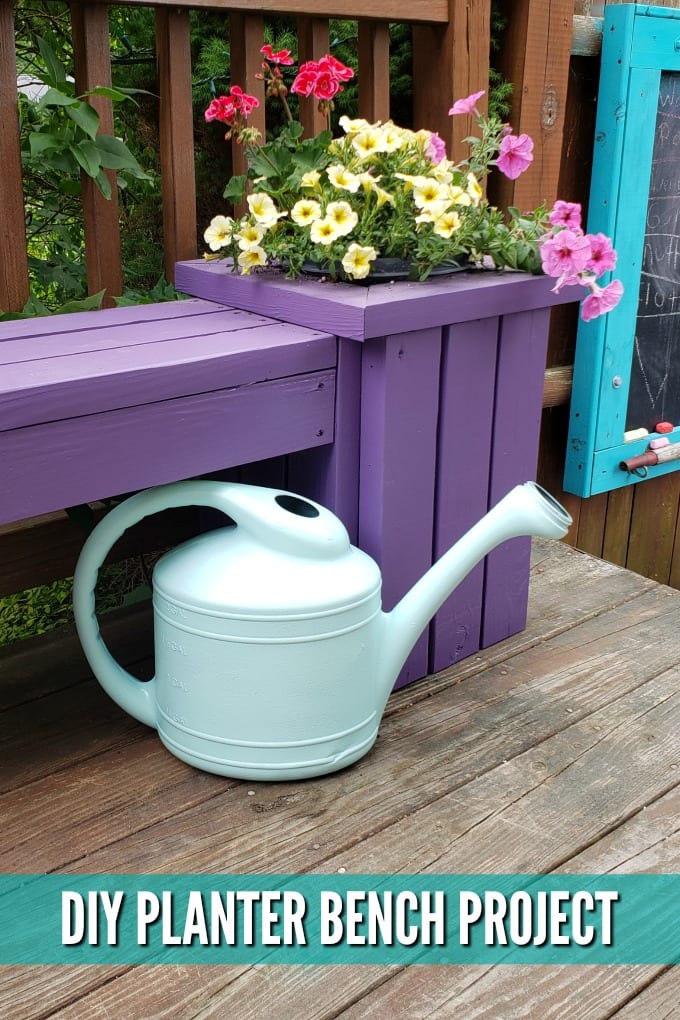

Wendy Polisi says
This looks like such a great project that I need to try!
Jenn says
You make these projects look so easy! I love the color especially 🙂
Nancy says
Just priced some outdoor benches - ouch!! This is a much more affordable alternative and even though I don't have "mad" carpenter skills, I know I can tackle this one - love all the tips and the step by step instructions!!
P.S. - love the purple color!!
Ang Paris says
Thanks so much for your sweet note, Nancy! This was definitely more economical than purchasing one 🙂
Eileen Kelly says
You make the best tutorials and they are so easy to follow. We have just finished a huge redo in our yard and patio. This planter bench is the perfect addition to our backyard. You have made it so easy to follow your directions.
Ang Paris says
Thanks for stopping by Susanna! Good luck 🙂
Ellen says
So so cute and I love the color! Purple is my favorite! Such a fun project.
Melissa Riker says
I absolutely love this, thanks for the tutorial!!
Ang Paris says
My pleasure! This was a fun project for sure.
Thanks for stopping by Melissa 🙂
Ang Paris says
YES! It works beautifully for so many different projects 🙂
Janet E Bowers says
Where did you get the pots and size to put in the planter. I can't find anything thats fits flush for that size.
I just finished my bench except for painting and it really turned out great and I love it.
Ang Paris says
Hi Janet! I'm so glad you enjoyed this project. I found the containers online by searching for the dimensions of the openings.
Good luck!
Ned says
Thanks for the great tutorial. This planter was easy to put together. I made two of them to go on either side of my patio.