• Skip to primary navigation
  • Skip to main content
  • Skip to primary sidebar
  • About
    • Privacy Policy
    • Work with Me
  • Recipes
    • Breakfast
    • Appetizer
    • Dinners
    • Instant Pot
    • Slow Cooker
    • Salads
    • Side Dishes
    • Desserts
    • Grilling
    • Condiments and Spice Mixes
  • Shop
  • FAVORITES
  • Subscribe

Juggling Act Mama logo

  • Facebook
  • Instagram
  • Pinterest
  • TikTok
  • Twitter
  • YouTube
  • Home
  • Recipes
  • Game Day Menu
  • Holidays
menu icon
go to homepage
  • Home
  • About
  • Recipes
  • Quick Meals
  • Reader Favorites
  • DIY
  • Holidays
    • Facebook
    • Instagram
    • Pinterest
    • TikTok
    • YouTube
  • search icon
    Homepage link
    • Home
    • About
    • Recipes
    • Quick Meals
    • Reader Favorites
    • DIY
    • Holidays
    • Facebook
    • Instagram
    • Pinterest
    • TikTok
    • YouTube
  • ×

    Home » DIY

    Design Your Own Phone Case

    [published_or_updated] · by Angela Paris · 1 Comment[affiliate_disclosure]

    Pin
    Share
    Turn your favorite photos into a one-of-a-kind phone case. This easy tutorial will show you how to create a custom phone case using your favorite snapshots. So simple and so chic!
    Jump to Project Print Project

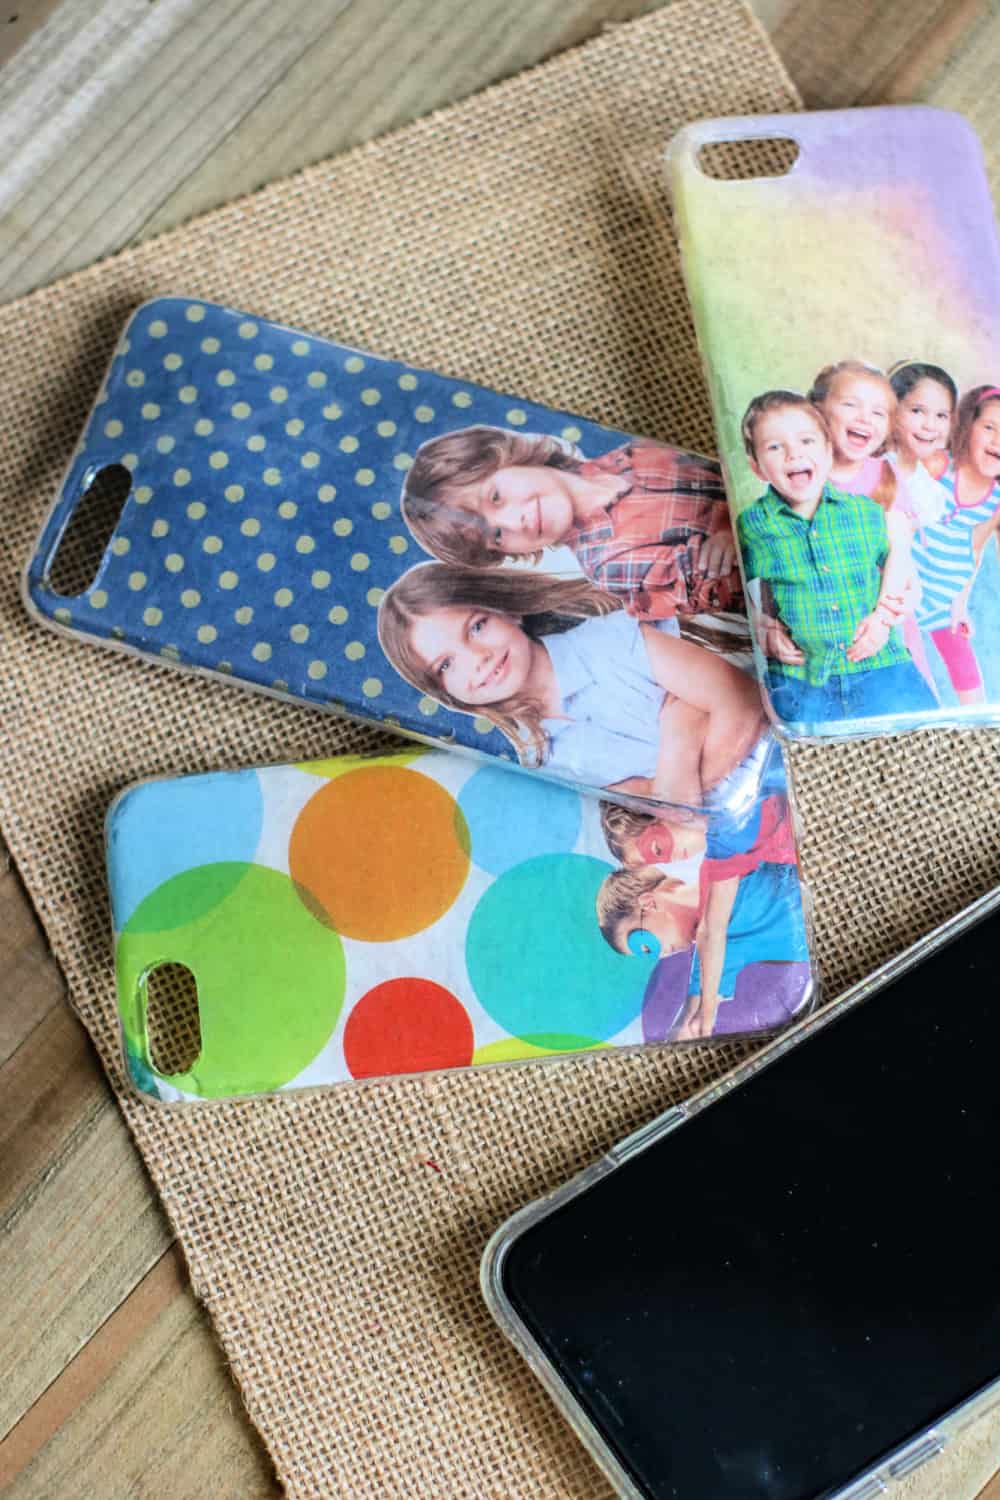
    It's simple and inexpensive to design your own phone case with photos. These make really sweet gifts, too. We'll show you how so you can get crafting right away.

    Top down view of Personalized Cell Phone Cases on a tabletop.
    Jump to:
    • ✂️ Supplies Needed
    • 📝Instructions
    • ⭐ Tips
    • 💭 Frequently Asked Questions
    • Tips for Printing Photos
    • More DIY Phone Case Ideas
    • Similar Projects
    • 📋 Tutorial
    • Photo DIY Phone Case
    • 💬 Comments

    To create a DIY phone case design, start by finding a photo you really love. Next, find a pretty or fun tissue paper, and you're nearly halfway there to having a customized phone case!

    This DIY phone case is a fabulous project for kids to do for Mother's Day, Father's Day, or Grandparent's Day.

    When you design your own phone case using this method, it's really pretty inexpensive! You can pick up just about all the things you need at your local dollar store, or order supplies online.

    Materials for making your own cell phone case.

    ✂️ Supplies Needed

    The following are affiliate links. We are a participant in the Amazon Services LLC Associates Program, an affiliate advertising program designed to provide a means for us to earn fees by linking to Amazon.com and affiliated sites. We also participate in other affiliate projects. For more information, please see our disclosure policy.

    • Photo paper
    • Tissue paper
    • Mod Podge in matte finish
    • Paintbrush
    • Clear silicone cell phone cover (available at Dollar Tree)
    • Ruler
    • Scissors and/or craft knife

    Be sure to check out my Juggling Act Mama Storefront on Amazon where you'll find all kinds of great products to make your life easier! Thanks so much for being a part of Juggling Act Mama ❤

    📝Instructions

    Here's how to make your own phone case with pictures:

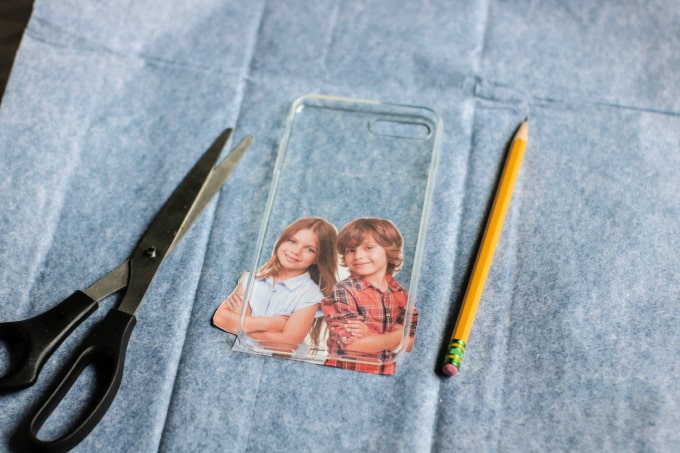
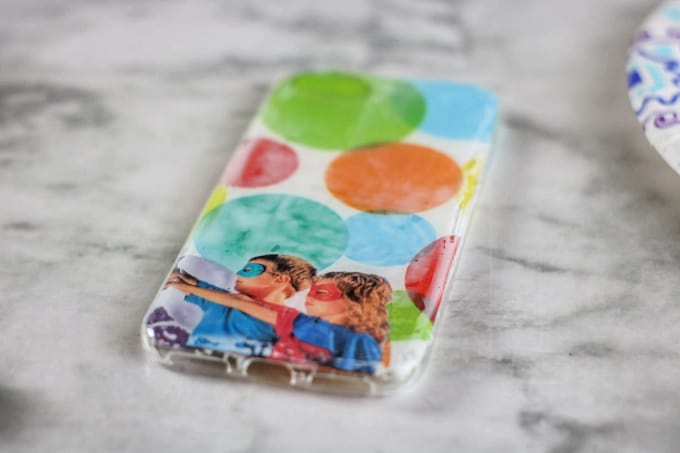
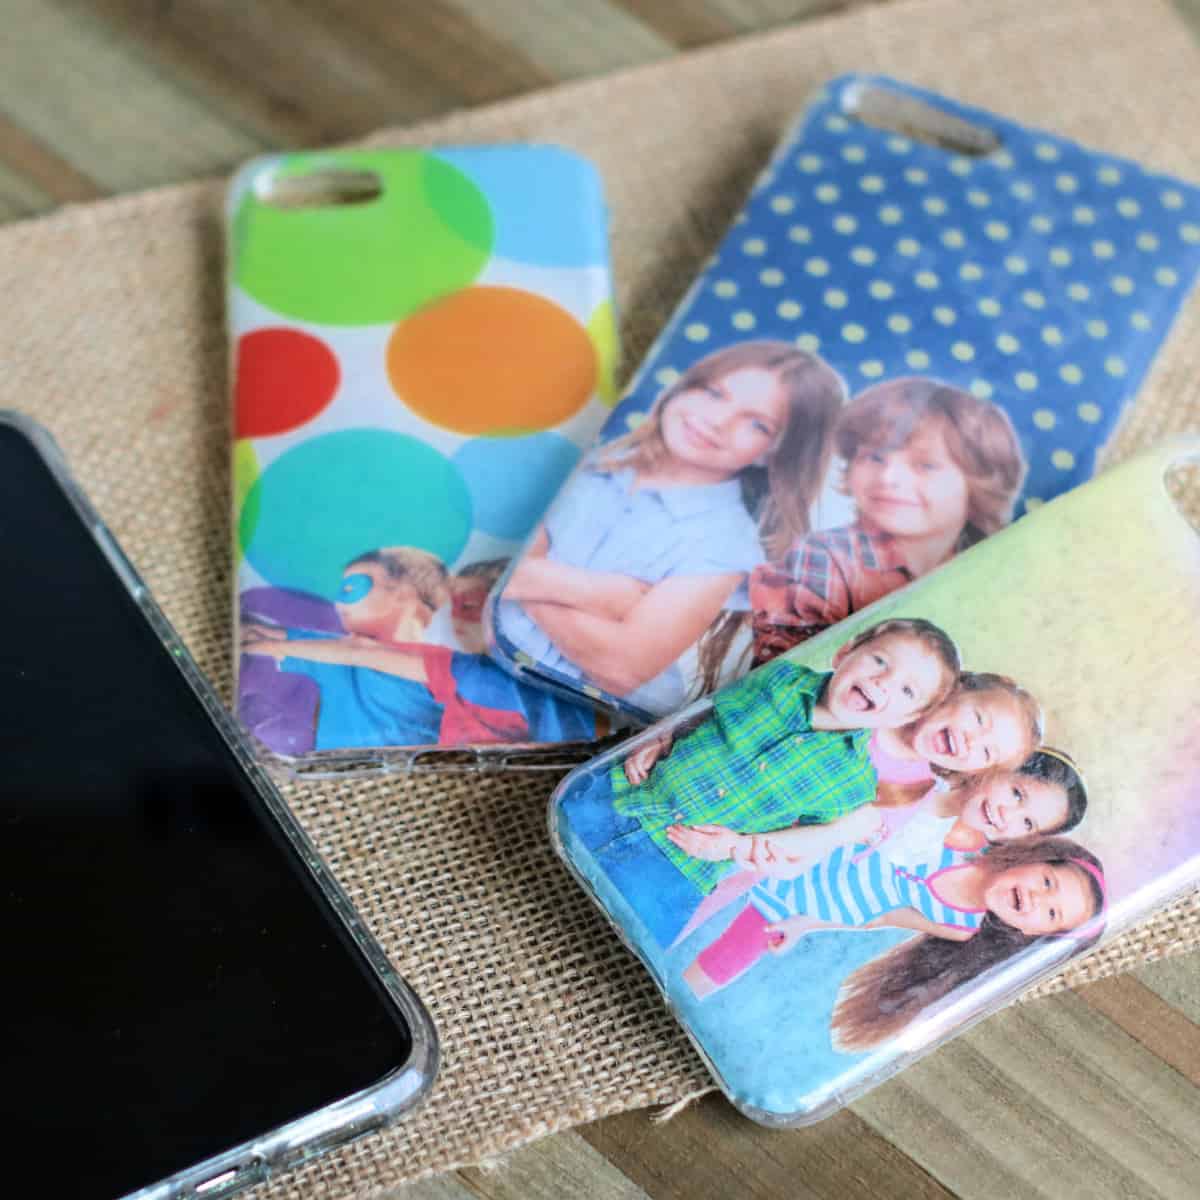
    1. Measure your cell phone case. Print a photo of your choosing to fit the case. Place the cell phone case over the picture (as seen in the photo below), check the placement, and trim the photo to fit, if necessary.
    2. Place the silicone phone case over the tissue paper and trace. Trim off the excess tissue paper to fit it to the case.
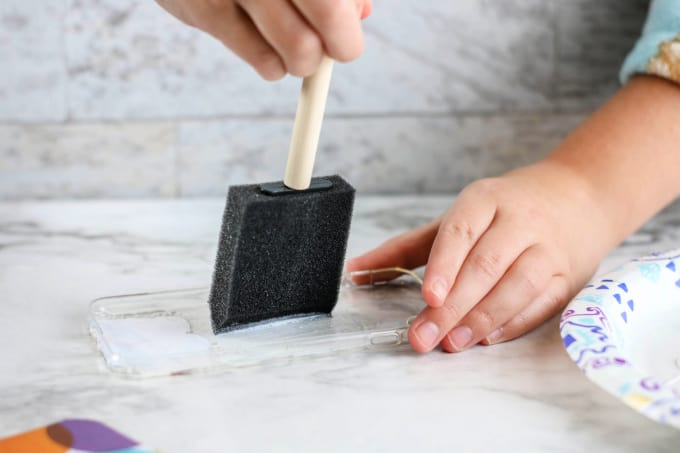
    3. Use the paintbrush to apply a thin layer of Mod Podge inside the silicone phone case where you plan to place the photo. Put the picture over the Mod Podge, with the image facing outward through the phone case.
    4. Apply a second thin layer of Mod Podge over the photo. Press the tissue paper into the phone case.
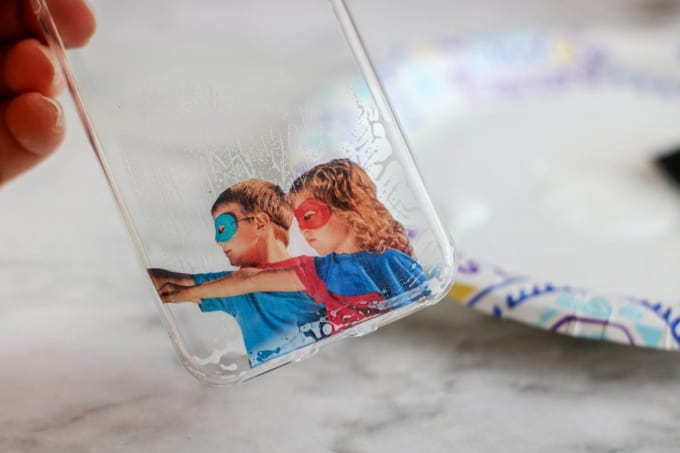
    5. Allow the Mod Podge to dry completely (at least 24 hours). Use scissors or a craft knife to trim around the hole for the camera and your phone's buttons.
    Scissors, phone case, pencil, and photo on a piece of tissue paper.
    Customizable phone cases with photos - clear phone case with photo.
    DIY phone case design with photo with tissue paper background.

    ⭐ Tips

    ✔️Use light layers of mod podge for best results.

    ✔️Allow the mod podge to dry completely before placing the case onto your phone.

    Square view of Personalized Cell Phone Cases on a tabletop.

    💭 Frequently Asked Questions

    Here are some questions (and answers!) readers often ask about using mod podge to create a DIY phone case design.

    What is mod podge?

    Mod podge is used for many types of crafts, including decoupage. It is used as a glue, but is also used to seal and finish surfaces.

    How long does it take mod podge to dry?

    Mod podge may take up to 24 hours to dry fully, depending on how much is used.

    Is it expensive to design your own phone case?

    When you're using craft supplies like mod podge and tissue paper, the cost for making your own cell phone case is pretty minimal.
    Ordering a custom phone case online can be expensive, but making one using your own photos is very cost effective.

    Tips for Printing Photos

    • Use a good quality photo paper - I like this one.
    • Be sure that your printer is not low on ink.
    • Under printer settings, always select the highest print quality.
    • Photos use a lot of ink, so take care removing them from the printer so as not to smudge them.

    Printer recommendation: I have used Canon printers for many years, and now have a Pixma model that I love. It is simple to use and produces good quality prints.

    More DIY Phone Case Ideas

    Here are some more phone case DIY ideas you might enjoy:

    • Scrap Paper Smart Phone Case from Lovely Indeed
    • Easy Paint Chip Phone Case from Plaster & Disaster
    • DIY Glitter Phone Cases from Persia Lou
    • Washi Tape Cell Phone Cover from The Crafty Blog Stalker

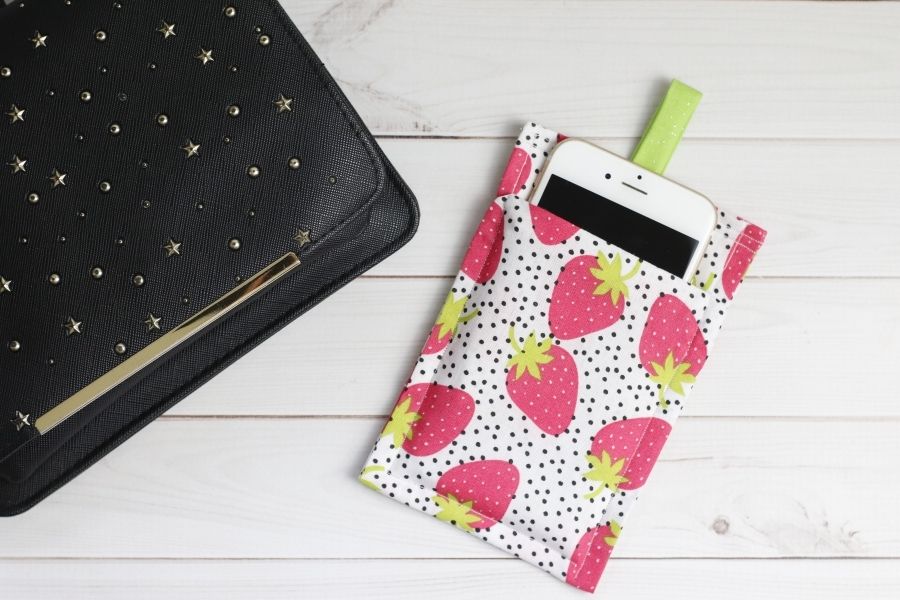
    Isn't this fabric phone holder from Happiest Camper so cute? All you need to do is choose your favorite fabric and sit down to sew!

    Similar Projects

    Here are some other DIY projects you might also enjoy:

    • Shrinky Dink Initial Key Chain Project
    • Cricut Picture Frame for Father’s Day
    • DIY Coaster Ideas
    • Rustic Herb Garden Planter
    • Easy Sharpie Craft Projects Anyone Can Do
    • Close up of patio string light.
    • Pool Pallet Storage with towels, pool noodles, etc.
    • A tall cedar planter box on porch with boxwood.
    See more DIY →

    📋 Tutorial

    Not ready to Design Your Own Phone Case yet? Don’t forget to pin this project for later! When you do make it, please be sure to tag me on Instagram @jugglingactmama or #jugglingactmama – I’d love to see your pictures!

    Square view of Personalized Cell Phone Cases on a tabletop.

    Photo DIY Phone Case

    Turn your favorite photos into a one-of-a-kind phone case. This easy tutorial will show you how to create a custom phone case using your favorite snapshots. So simple and so chic!
    No ratings yet
    Print Pin Rate Add to Collection Go to Collections
    Prep Time: 5 minutes minutes
    Cook Time: 15 minutes minutes
    Drying time: 1 day day
    Author: Ang Paris

    As an Amazon Associate, I earn from qualifying purchases.

    Materials

    • printer paper
    • gift tissue paper
    • Mod Podge matte
    • paint brush
    • clear silicone cell phone color available at Dollar Tree
    • ruler
    • scissors and/or craft knife
    Get Recipe Ingredients

    Instructions

    • Measure your cell phone case. Print a picture of your choosing to fit the case. Place the cell phone case over the photo, check the placement, and trim the photo to fit if necessary.
    • Place the silicone phone case over the tissue paper and trace. Trim off the excess tissue paper to fit it to the case.
    • Use the paint brush to apply a thin layer of Mod Podge inside the silicone phone case where you plan to place the photo. Put the picture over the Mod Podge, with the image facing outward through the phone case.
    • Apply a second thin layer of Mod Podge over the photo. Press the tissue paper into the phone case.
    • Allow the Mod Podge to dry completely. Use scissors or a craft knife to trim around the hole for the camera and your phone's buttons.
    Tried this project? Pin It for Later!Mention @jugglingactmama or tag #jugglingactmama!
    Pin
    Share
    « LEGO Party Ideas For All Ages
    Rose Petal Bath Bombs »

    Reader Interactions

    Comments

    1. FC says

      December 16, 2024 at 8:41 pm

      Love the creative ideas for designing your own phone case! Personalization makes tech accessories even more special.

      Reply

    Leave a Reply Cancel reply

    Your email address will not be published. Required fields are marked *

    Recipe Rating


    Primary Sidebar

    Welcome! I'm Ang'e - the Juggling Act Mama! I love sharing quick and easy recipes, creative DIY projects, and fun family travel with you. Like many of you, I am a multi-tasking mama juggling priorities which is why here I offer solutions to tame your hectic lifestyle.

    More about me →

    Delicious Smoothie Recipes Story

    POPULAR POSTS

    • Homemade Cowboy Butter in a small yellow dish with a butter knife.
      Cowboy Butter
    • Top down view of teriyaki chicken wings.
      Honey Teriyaki Chicken Wings
    • Sheet Pan Pancakes with Pancake Mix: stack of pancakes with strawberries and blueberries.
      Sheet Pan Pancakes with Pancake Mix
    • Cheesy John Wayne Casserole on a plate with a fork.
      John Wayne Casserole

    Footer

    ↑ back to top

    About

    • Privacy Policy
    • Disclaimer
    • Terms & Conditions
    • Republication Policy

    Follow Us

    • Facebook
    • Pinterest
    • Instagram
    • YouTube
    • TikTok

    Contact

    • Contact
    • Work with me
    • Copyright Notice
    • Trademarks

    Juggling Act Mama is more than just recipes—it's a trusted resource for busy families looking to make mealtime simple, stress-free, and delicious. Whether it’s a 30-minute dinner, a slow cooker shortcut, or a budget-stretching batch-cook plan, we’re here to help you juggle less and savor more.

    READER FAVORITES

    • Close up square image of Chicken Broccoli Pasta Bake in a bowl with a fork.
    • Close up of cowboy spice rub on a small wooden spoon.
    • Close up of Puff Pastry with Chicken on a plate.
    • Pool Pallet Storage with towels, pool noodles, etc.
    • Party Cotton Candy Mocktails surrounded by confetti.
    • Hand holding a ppot with a plant and adding soil.
    • A tall cedar planter box on porch with boxwood.
    • Close up of mashed sweet potatoes.
    • Two glasses of Tropical Storm Punch with straws and drink umbrellas.
    • Summer Beach Tote Hack: bucket with a handle full of summer essentials like sunscreen and bug spray.
    • Close up of Mermaid Drink Lemon Drop cocktail.
    AS SEEN ON

    Copyright © 2011-2025 Juggling Act Mama

    Rate This Recipe

    Your vote:


    A rating is required
    A name is required
    An email is required